-

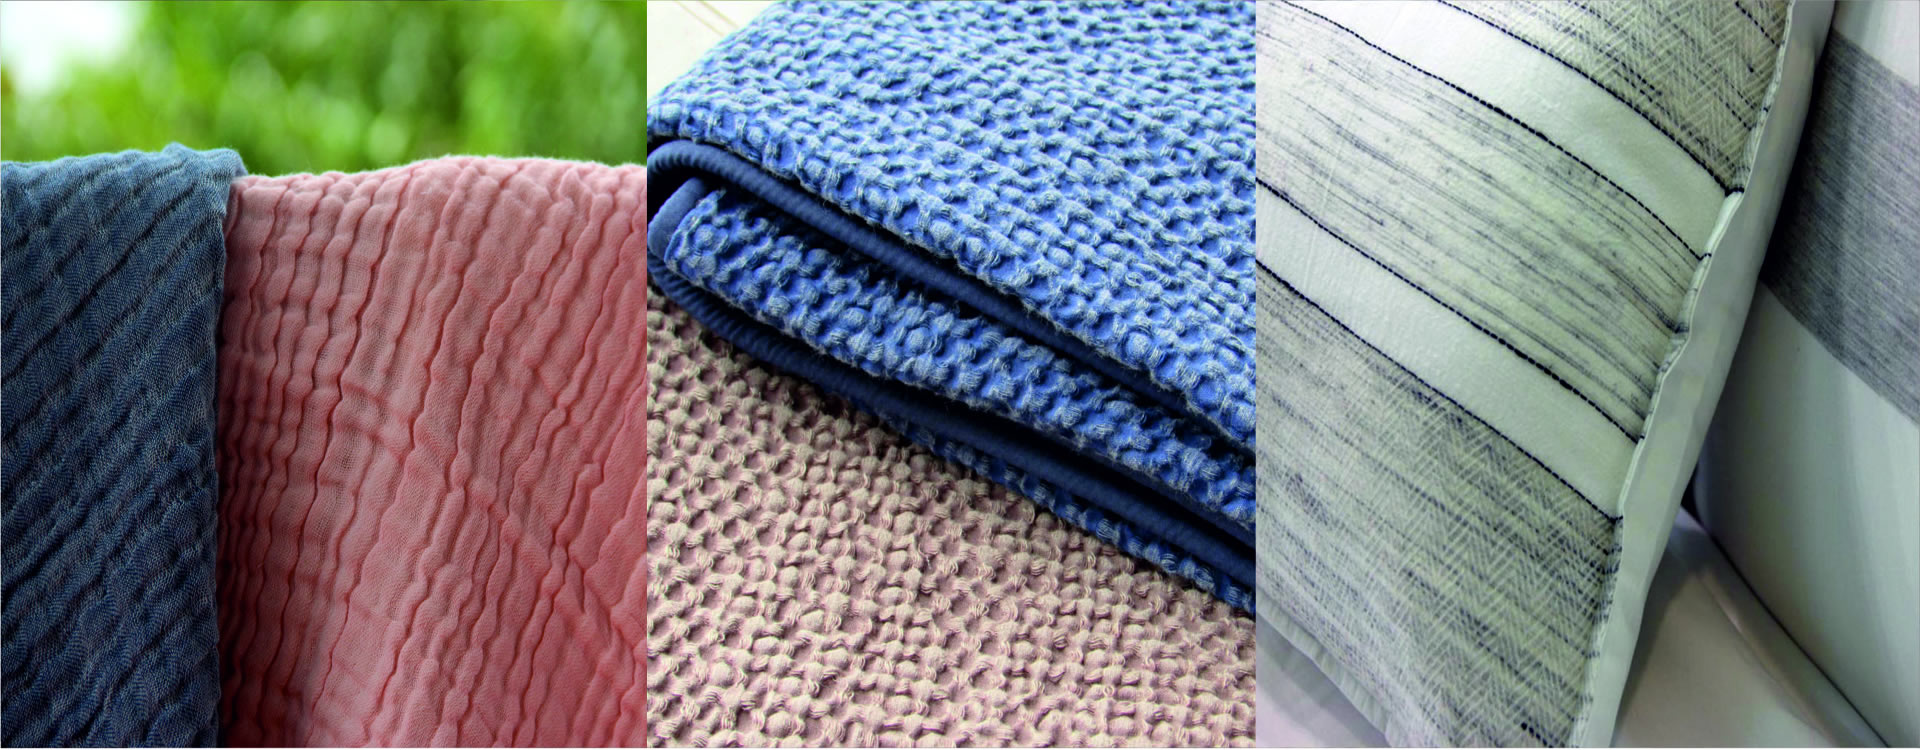
Welcome to The Creative Texture
luxury fabrics at its best!- Know More -
Experience a cotton treat of high-end bedding fashions

-
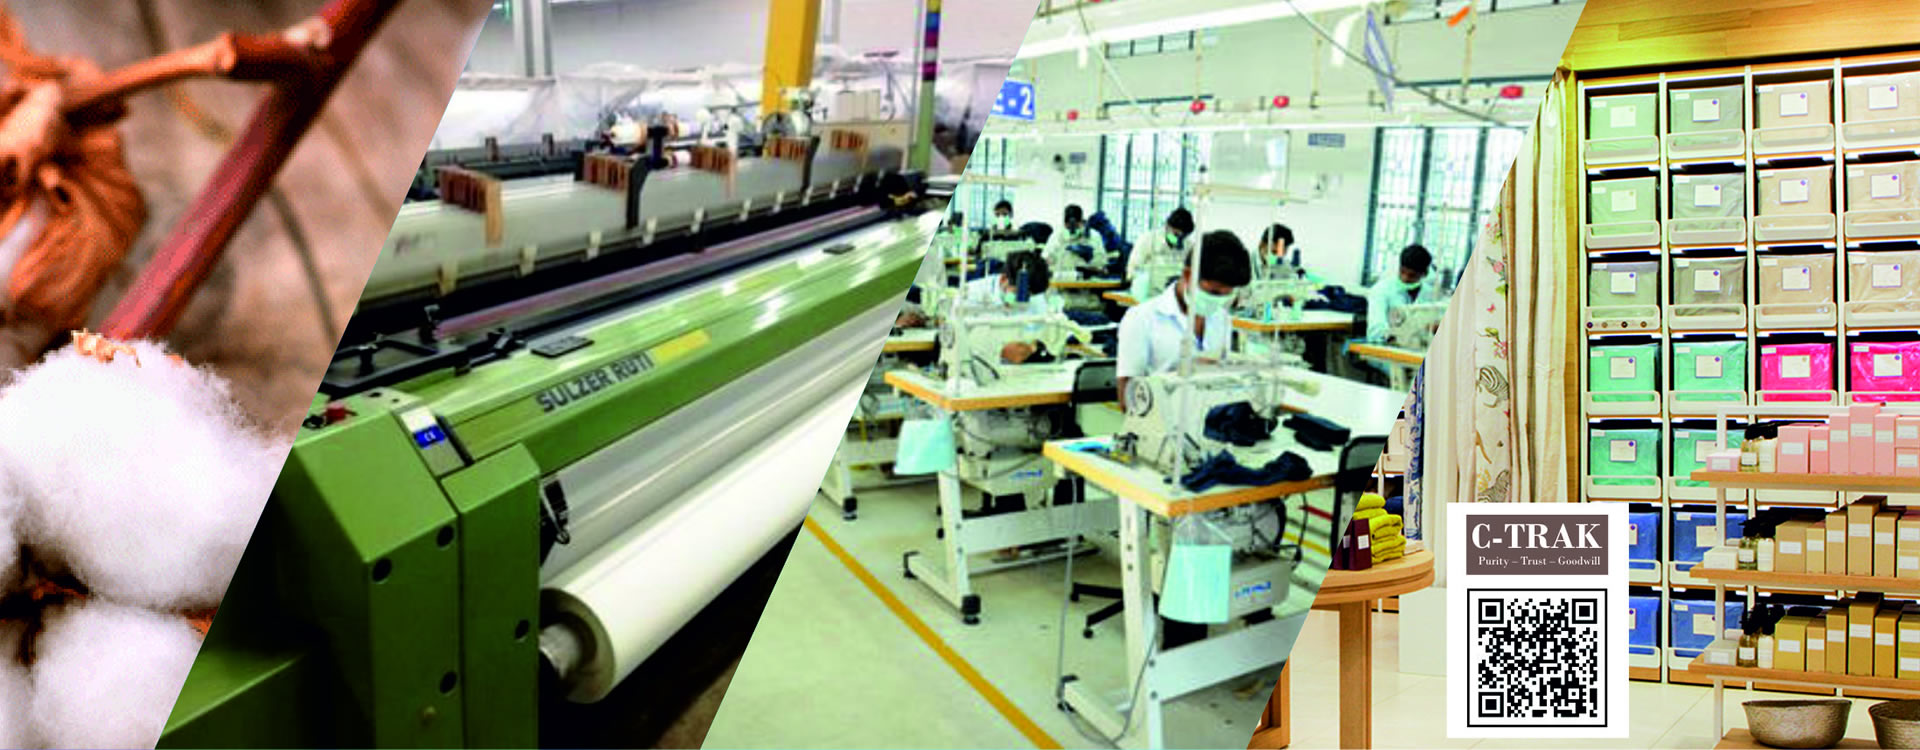
Introducing the cotton tracking
technology C-Trak- Know More -
Trace the organic cotton journey from fiber to fashion
-

Our Passion for fabric purity also
extends to Fair-Trade Practices- Know More -
We support our Farmers!
-
Pioneer in Home Textile
Manufacturing- Know More -
Developing new ideas on Bedding fashion
Organic Farm

Ginning

Spinning

Weaving

Processing

Madeups

World’s Fastest Growing High Fashion Bedding Company
About Us
At The Creative Texture, we manufacture luxury-range home textiles, finished bedding linens, cotton products & more, and serve as a large-scale supplier and exporter to top global brands and labels, across the world. With a perfect blend of using traditionally farmed organic cotton and ultra-modern manufacturing facilities to make finished goods, we take great pride in our world-class luxury range beddings, the very reason why we are one of the most sought-after Indian suppliers for major international retail brands.
Our consistent product quality has garnered several accolades, awards and recognitions, only to motivate us and keep raising the bar, specifically in the export segment. We delightfully support organic farming and purchase only high-quality cotton that benefits our farmers, nature and ultimately our planet.
Infrastructure
Weaving
- State of art Imported machines
- ISO 9001certified
- 6,00,000 Meters/month
- 150 to 1200 Thread counts
- Hospitality construction
Processing
- 5 Lakhs Meters/Month in wider
- 10000 Kgs/Month Yarn Dyeing
- 11 Colors Pigment Printing
- Special Finishes - Anti pilling, Crinkle
- Excellent color fixing
Made ups
- 75000 Sets/Month
- 120 Modern sewing machine
- 350 Technically skilled workers
- 5 Autometic Inspection Table
- Special stitches - Merrowing...


News & Trends
Our Global Presence
[contacts]